Before I start I would like to thank everyone who has shown support for me in these early stages. You guys are what is keeping me from slacking and continuing to try to find new content to post about. In the first 3 days I have seen over 100 unique visitors! Glad to know people are actually reading!
Now, enough of me blabbing. Blog entry actually starts after the jump!
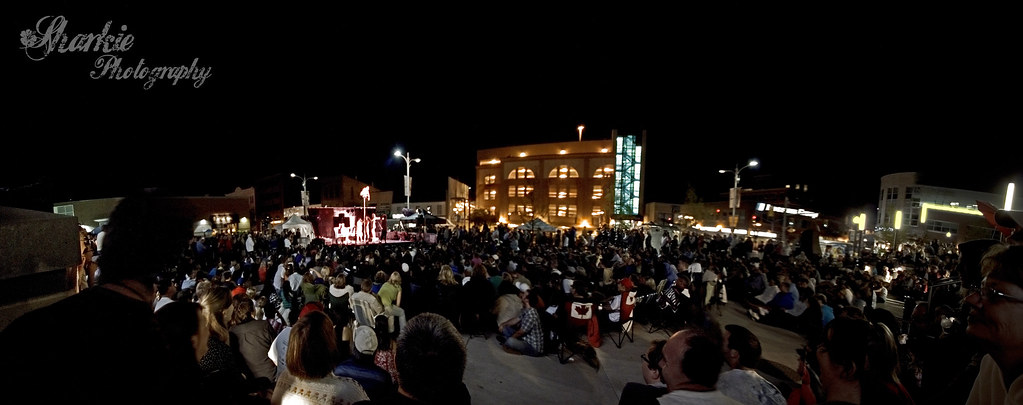
Have you ever encountered a situation where the scene you want to capture is too expansive to record with a single shot, even with the widest of wide angle lenses? Whether you are looking out to a wide rolling valley or in a crowd where you can not back away enough to capture everything, panoramas might be the thing for you. And thanks to all the geeky geniuses at Adobe, Photoshop (CS5 in this case) does all the heavy lifting for you!
All thanks to a handy tool called "Photomerge"
Waterloo Busker Carnival 2010
Click image for full size
What photomerge will do is identify similar or "same" portions of separate images that you want to merge and overlap them. The theory is that you now have a seamless transition from one image to the next. Stich many of these together and you have a panorama. It is really cool, and you can't really have an appreciation for it until you use it and see it in action.
What to do:
- Go to "File" > "Automate" > "Photomerge". A dialog box will appear.
- Under source files select the images you wish turn into a panorama. If you use "Files" you can select the individual files you wish to merge. If you select "Folders" photoshop will attempt to merge all files contained in the selected folder.
- Select a one of Photoshop's layout options.
- "Auto" will have Photoshop analyze the images and determine which option to use.
- "Perspective" will use (by default) the middle image as a reference and transform, reposition, stretch or skew the surrounding images to form an image that matches.
- "Cylindrical" will reduce the distortion caused by "Perspective". The images near the edges will be skewed and stretched in order to fit the pre-set perspective in "Perspective". This alteration will cause a "bow-tie" effect distortion. This is best if the far corner portions of the end images are required, otherwise you can use "Perspective" and crop the distorted edges.
- "Spherical" maps images as if they were within a sphere. Use this for 360 degree panoramas.
- "Collage" will overlap and transform, skew and scale image layers.
- "Reposition" will move images to overlap similar content but not transform the original images in any way.
- Select any extra alterations you want Photoshop to do
- "Blend"- Best if you want to do more layer alterations after photomerge
- "Vignette Removal"- Removes vignettes caused by lens distortion
- "Geometric Distortion Correction"- Corrects for all other lens distortions such as barrel, pincushion and fisheye distortion.
- Click "Ok" and let Photoshop do all the work for you!
Really, after Photoshop is done (may take several minutes... give the poor program a break! It's a lot of work!) the panorama is complete. Any alterations you need to do can be done with the new Photoshop file.
Now to backtrack!
Important things to keep in mind when taking photos with the intention to photomerge into a panorama.
- Overlap images significantly. Greater than 25% is generally the convention so that Photoshop has enough information to identify portions of the images that are the same and overlap them. But! Don't overlap too much, if you overlap by greater than 70% Photoshop will have difficulty blending the images together and you may not end up with the sharp panorama you were expecting!
- Use the same camera settings throughout all images used for the panorama. this includes focal length, shutter speed, aperture, ISO, exposure compensation and should include focus.
- Keep the camera level and in the same place throughout the photo-set. Using a tripod and a spirit level would be ideal.


No comments:
Post a Comment