
Of course she had no idea that I would be conscripting her help first!
Read more after the jump!
What you will need:
- Fruit! (May I suggest something that will not make a HUGE splash!- you'd be surprised how much a strawberry will splash even from a short distance.
- Come sort of clear container to hold water (I used- read stole- a couple of clear acrylic containers from IKEA that my girlfriend had. A fish tank will also do)
- Water- lots of water
- Towel (or two or more- depends on how messy YOU are!)
- Small paintbrush
- Tripod
- Remote Shutter Release
- Speedlite flashes
- Wireless flash triggers
That list may seem daunting- but I'll walk through it. There may be some cheats that I will try to include, but feel free to post some in the comments!
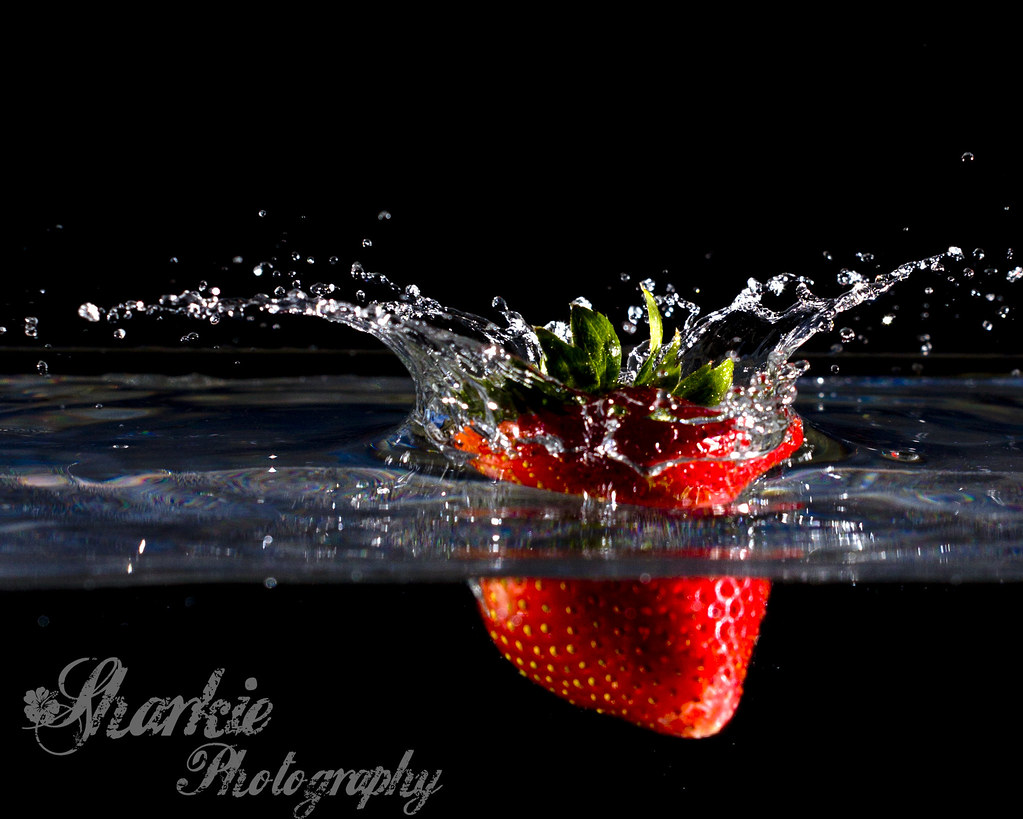
What I did first was set up my container about half filled with water. This gave me about 3 inches above the water level and about 3 below the water level. Considering the idea was to capture the moment the strawberry hits the water and makes a splash we should only NEED the couple inches above the water (to catch the splash) and about an inch below the water (to catch the strawberry). After a few shots I realized I would have to keep cleaning water off of the inside of the container (above the water level) because of water drops from the splash. This got really tedious (less so for me- more so for my conscripted water-cleanup-girl). So what I tried next was to place the container on a baking pan and fill the container all the way, so you could not really tell the edge of the container from the top of the water. In the above picture you can see the top of the container, but it looks like a part of the splash/water rippling. It was much easier to top-off the water that spilled out of the container and wipe up some streaks on the outside of the container than it was to wipe up drops on the inside.
Two speedlites were used for this shoot (Two SB-28), triggered remotely on light stands on either side of the table that water-filled container was on. I had them about 3-4 feet away on either side. This is a lighting diagram of the setup. the "model" is the container/strawberry (Hey, strawberries are people too!).
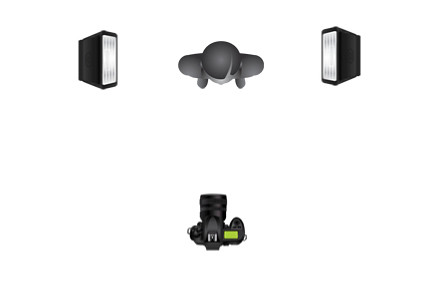
Flashes were bare. No diffuser or other light modifiers. Since the wall behind the setup was about 7 feet away and I opted to use a lens hood, I did not bother flagging the flashes to prevent light spill forward and backward. This meant no lens flare and no illumination of the background.
Next I set up the camera on the tripod. I used my Canon 70-200mm f/4 as it is my sharpest lens. At 70mm, I was only about 3-4 feet away. The field of view however was pretty wide to make sure I caught all of the splash. Shot in portrait the field of view was probably about 6-7 inches tall. The final shots were cropped in as far as I could, keeping the whole splash in the shot. The remote flash trigger and remote shutter release was then attached to the camera. I tried a few shot angles and found that shooting slightly down at the surface of the water provided the best shots.
Having the camera try to catch a falling strawberry with AF might be asking too much of it. So I pre-focused on the spot I was going to drop the berry. There are many ways you can do this, but what I did was hold the strawberry at the water's surface- where I wanted it to be in the shot- and took a test shot. This way I could look at the LCD and determine if that was where I wanted the focus. If it was good I would switch the lens to MF and leave it. As long I continued to drop the strawberry in the same spot they would be in focus.
Flashes at 1/16 power and camera at ISO-100, 1/200 sec (max sync-speed) and f/7.1 (in retrospect I could have probably bumped this up to f/9 or f/10 to get more depth of field).
Next was the actual shoot. It takes a lot of trial and error! What I ended up doing was holding the strawberry with one hand and the remote shutter release with the other, dropping the strawberry and almost right after pressing the shutter release. I tried having my girlfriend drop the strawberry and trying to catch the shot but I was always too slow. While I do appreciate the help (I do!) it was much easier to this part myself.
The small paintbrush is to help dislodge any bubbles that may form when you pour water or drop berries into the container. These microbubbles will stick to the sides of your container and will be a pain to edit out in photophop, especially if they are where you will supposedly see your strawberry. Just run the paintbrush along the sides of your container and the bubbles will float away!
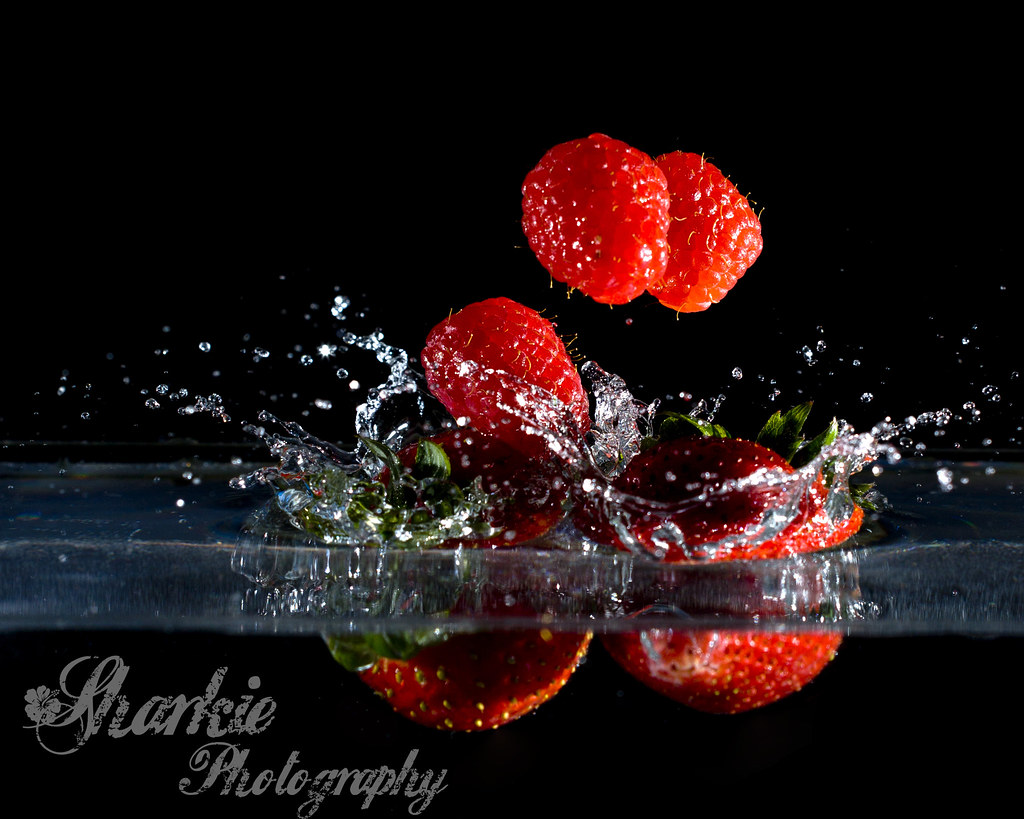
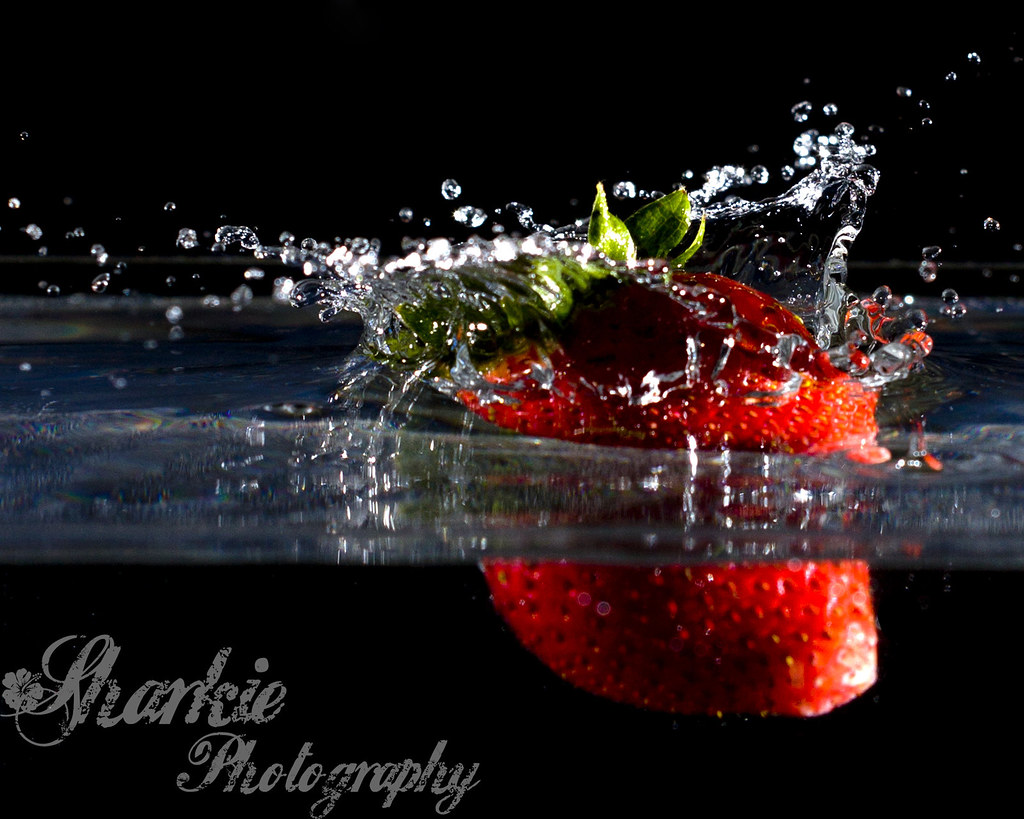
After about an hour and about 150 frames I packed up and opened up the files on the computer. A quick crop, slight exposure fix and cloning of water spots later I had the shot above- and about 20 more keepers, including these:
Now- some tips and cheats!
- When dropping strawberries. Avoid dropping them straight down- that is apex down. The strawberry will cut the water so nicely that you get very little splash (Unless small mess is what you are going for- in that case, where's the fun in that!?)
- Have lots of towels handy. Water spillage and splashage (yeah, splashage) is very likely. Oh- and electronics don't so much like water.
- If you don't have speedlites or a remote trigger set. You can also use table lamps. Just be sure to correct your white balance to the colour temperature of the bulbs. If using CFLs be sure to let them warm up completely beforehand.
- The dollar store is your friend. Containers galore can be found here if you don't have one that is suitable.
- If you don't have a remote shutter release you can have a friend help and try to catch the shot, or you can fire tethered from your computer with supplied USB cords and software.
- Take lots of shots. Your ability to time your shot will only get better. And the more shots you take the higher your chance of getting a few good ones! Deleting 100 images in digital is a lot cheaper than deleting a 100 images in film!
No comments:
Post a Comment